Friday, June 29, 2012

A DIY Fourth of July


It is our year to host the annual 4th of July BBQ with our neighbors and I decided I needed some more decorations. All I have are some patriotic stars, a placemat and two Lenox mugs with flags in them. My first project was of course a wreath. Since my last 3 wreaths for the holidays were all made out of yarn I decided I wanted to try something different.


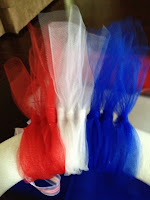
Patriotic Tulle Wreath
Supplies:
2 Tulle spools of 25 yards in red, white and blue
Styrofoam wreath 14in.
Ribbon to hang the wreath
Glue Gun
Scissors


Cut the tulle into 22in. pieces. I used all of one spool and a little of the second one. The first step is to hot glue the ribbon to the wreath. I combined to different pieces of ribbon to get the look I wanted. Then fold the tulle in half and use the loop and pull through method around the wreath, starting right next to the ribbon. It worked best for me to use 3 of each color. Make sure you make them tight against each other. When you are finished you can add an accent piece to the wreath. I hot glued the star to the underside of the wreath. Then I fluffed the tulle and hung it on my door. I love the way it turned out!


Rockets!
My second project turned out to be hanging rockets. I made all four in one afternoon.
Supplies:
Cardboard paper towel cylinders
(I also used the cardboard from the tulle that I used up).
Scrapbook paper in patriotic patterns and colors.
Ribbon
Hot glue, scissors and something to help you cut a circle
Start off by cutting your circles for the tips of the rockets. Mine wet about 4 to 5 in. across. Once you have your circle, cut a slit in it from one side to the center. Then fold the circle around to form your rocket top and glue it together. Next, I cut the scrapbook paper and hit glued it to the cardboard.
To attach the rocket top poke two holes across from each other at the top of the rocket. This is for your ribbon to hang up the rocket. You could also use string. I cut a long piece of ribbon and pulled it through the two holes. Then I tied them in a knot close to the cardboard. Now, cut a small slit in the top of the rocket and pull both ends of the ribbon through. Once they are through knot them tightly at the top of the rocket. For the ribbon at the button of the rocket I cut 6 pieces of ribbon. I tried to use different colors and styles. Hot glue each piece of ribbon onto the cardboard. The final step is to cover where the ribbon with another coordinating piece of scrapbook paper. It can be as wide as you want it. Mine are about an inch. Hot glue the paper and then your rocket is finished. This turned out to be a very simple project and my 7 year old son was even able to help me. I love how festive they look. I think I will hang them in the patio.

Tuesday, June 19, 2012

Adding Some Spice to Normal Office Supplies.

Decorative Notepad Holders

Decorative Notepad Holders
One of my latest projects has been to create cute office supplies for myself and my friends. My first project was to create notepad holders. I found the idea on Pinterest. They are very simple to make and you can customize them in many different ways. I generally buy my frames at Walmart and I stick with 5X7 frames.  They are usually under a $1.00. I did make a 4x6 frame for my son but the notepad takes up most of the frame. You can also turn the frame to the side or keep it straight up and down like the ones pictured to the left.


Notepads for Gifts


Supply List:

  • $1.00 plastic frame 5x7
  • Scrapbook paper
  • Mod Podge
  • Clothespin
  • Tacky glue
  • Glue gun
  • Ribbon
  • Sticky note pad (You can use a plain color or one with a design).
  • Embellishments

Two different sizes.
The first step is to cut your scrapbook paper.  Sometimes I use two different scrapbook paper designs. Cut the paper to the size of the frame. And then slide the paper into the frame. Everything glued directly to the frame is glued with Tacky glue. The hot glue gun melted the plastic of the frame. I usually glue the notepad first and then decorate around it. Use Tacky glue to the entire back of the notepad. Then wait for it to dry before you add more decorations. Next, I usually glue ribbon to the top of the frame. You can add a clothes pin so that it can hold other messages. I usually decorate the clothespin with some mod podge and scrapbook paper. One that is dry I hot glue it to the ribbon on the frame. Finally, I add embellishments. Some items I have used: buttons, cardboard letters, flowers and stickers. It is very easy to create one to match a theme. I have made 10 so far and each one has turned out so differently. They also make great gifts.

Wednesday, April 25, 2012

My First Diaper Cake

One of the sweetest people I know and teach with is having a baby girl this summer.  Sarah is having her third child and I can't wait to see her!  When my friend Alison asked me for help with the invitations I told her I wanted to try and make a diaper cake for the shower.  I have never made one but I received one at my school shower and I loved it!  So I got on Pinterest and started looking at diaper cakes.  I never really found one that I loved but I did find some basic directions.  The website: Plan the Perfect Baby Shower, has fantastic step by step directions.  It actually wasn't too hard to make.  I made it in one evening.  I will say that the directions didn't tell me how much ribbon to buy only sizes and I did end up running out.  Fortunately I found other ribbon in my craft room and was able to complete the diaper cake that night.

Supplies:
Sarah's Diaper Cake
  • 60 newborn generic diapers
  • Lots of ribbon (I would buy two spools of each kind)
    • 1 inch wide
    • 1/4 inch wide
  • A cardboard circle the size of a cake plate
  • Large bottle of baby lotion
  •  8 oz. baby bottle
  • 60 small rubber bands (you can use hair bands)
  • Decorations  (You can buy as many or as few as you want)
    • rubber ducks
    • pacifier
    • travel size bath items
    • wash cloths
    • bibs
    • teething ring
Here are some pictures of the diaper cake I made.  Sarah said she loved it so that was good enough for me and Alison even used it as her center piece!
I will definitely make one for every shower.  It was so much fun.


First Step Roll the Diapers


Two Rows of Diapers
Bottom Layer is Complete


Sunday, April 22, 2012

Seusstastic

UNLESS...
Truffula Trees Anyone who knows me knows my love for Dr. Seuss. His books and quotes offer a lesson for kids and grownups. Every year in March we celebrate Read Across America at school. I try to carry Seuss with me throughout the year but even I feel my Seuss creativity coming out in March. This past year My son and I made Truffula trees from the story, "The Lorax". We painted pencils yellow, then let them dry. Next, we used a black paint pen to draw wavy lines on the pencils. Finally, we hot glued pom poms to the tops of the pencils on the erasers. Then we cut green strips of construction paper. After that we took a baby food jar and mod podge the green construction paper to it, so it looked like grass. To finish it off we put the pencil trees into the baby food jars. It turned out really cute and I loved seeing it on my desk.  This book and this activity are great for Earth Day as well.

School Craft Project:
I made cheaper versions of this with 2 classes this year.  We took black and yellow pipe cleaners and twisted them together. Then we glued the pom pom to the top.

Yarn Wreaths

One of my favorite new craft projects are yarn wreaths. They are super simple to make and real cheap! The main supplies are: a straw wreath, yarn and what ever decorative items you want to use.  Stay tuned I am working on four more...

Valentine's Wreath

Simple Valentine Wreath
The first yarn wreath I made was for Valentine's Day. Leave the plastic on the straw wreath. I wrapped the wreath tightly twice with the yarn. Then I made felt flowers. Cut the felt pieces in a circle. You can cut the outside of the circle in a wavy pattern. Then cut the felt in a spiral pattern leaving a circle at the end. It will look like a long wavy strip of felt. Start at the end of the felt strip and roll it up. When you get to the end hot glue the flower to the circle and you will have your flower. The bigger your felt circle the bigger your flower. You can make as many flowers in as many colors as you like. I just made a few red flowers for this wreath. I hot glued the flowers onto the wreath.

St. Patrick's Day/ Easter Wreath

Easter Wreath
I bought a larger straw wreath for the Spring holidays. I left the plastic on the wreath and wrapped it with bright green yarn. I made orange, yellow and white flowers for the St. Patty's wreath. I also added some wooden decorations I found. I attached each of these with Velcro to the wreath. Then I took the decorations off for Easter and added spring colored flowers and felt bunnies and eggs, again with Velcro. I love that I can use this wreath for 2 holidays!

Classroom Wreath

I made a technology Dr. Seuss wreath for my classroom door. I wrapped a small straw wreath with red yarn. Then I hot glued a plush Cat in the Hat to the wreath, some home made pencil Truffula Trees, (I will tell you more about these in my upcoming Seuss blog.) and CDs with Seuss and school stickers on them. I love seeing it everyday when I get to school.
Seuss/Technology Classroom Wreath


Angry Bird Birthday Party

Angry Bird Birthday Party Invitation

My son decided he wanted an Angry Bird party this year. 

Well all I can say is that my imagination took flight and with the help of Google and Pinterest we created a fun party.


January: Idea Hunt
The Kids Setting Up the Game
We started hunting ideas on the net. I was surprised to find lots of party ideas already out there. The main idea we found was to create an Angry Bird game in the backyard. It would require boxes to stack the pigs on. The pigs were plastic balls. Also, we would need a slingshot for the birds. I started saving Dell computer boxes (I am a technology resource teacher) and I bought plastic balls from Walmart.
Here is one of the main websites that started our party creations.
Kara's Party Ideas.

February: Buying Supplies
Angry Bird Plates, Napkins, Table Cloth and Cake all from Walmart
I started looking for supplies on the net and at the local party store. I was going with a basic color theme of red, blue, yellow and green. Originally I was going to buy plain party items in those colors. Then we found Angry Bird party supplies at Walmart. We purchased bird plates and napkins, pig table cloths, an Angry Bird flag and a pig piñata. I did have to order a Mylar balloon. We always get one for his parties since they last weeks. I got mine from Amazon but it turned out to be from Birthday Express.

March: Crafting Time
When it was time to start my crafting I had many different projects going on so I am going to discuss them all individually.
Small Birthday Banner
Birthday Banner:
I found a great website that offered free templates for party decorations. I printed them out and created my own banner for the party. I laminated each piece, and put them on a red ribbon.  I actually had enough to make two.  I hung one on the mantel and one outside on the patio.
Here is the website. Free Printables

Yellow Bird Ball
Angry Birds and Pig Balls:
I used paint pens to draw the faces of the pigs and birds on the plastic balls. For some reason the orange never dried and was sticky to the touch.

Birthday Invitation:
The Angry Bird invitations that I found online were on backorder so I decided to make my own.  I found an Angry Bird image on Google. I pasted it into Word and used a text box over the image to create my invite. You can see a copy of it at the top of this post.


Birthday Wreath:
I found a really neat ribbon wreath on Pinterest and decided to try it myself. I couldn't find bundles of cheap bows already made so I made my own. I used a straw wreath, floral pins and curling ribbon. I made around 70 bows. I cut 3 of each color and they were all about 15 inches each. Once I made a bow I used the floral pin to attach it to the wreath. ( I left the wreath wrapped in plastic.) Since I did a little at a time it took me a month to make the wreath.

Kids' Project:
I decided to have a craft center during the party. I made foam birds and pig examples. I cut out all of the needed pieces and got packages of googly eyes. I put all the pieces into plastic sandwich bags. This way the kids could copy my examples and glue the pieces together. I bought all the supplies at Hobby Lobby.


April: Party Time
Cake/Present Table Decorations
Pinata
Angry Bird Decorative Scene
 The goody bags included: Angry Bird stickers, pencil toppers and fruit snacks. I also had blow pops and eggs filled with slime. The kids would also get a golden egg filled with silly bands and a plush Angry Bird. I used the Plush birds as decorations. I put them on top of Easter grass so it looked like they were on nests. The kids got to pick one to take home. The golden eggs were used as a game (egg hunt). Other games included our own Angry Bird game complete with sling shot in the back yard. We also had a piñata, an Angry Bird bean bag toss and the Angry Bird board game was setup on our coffee table. It also made a great decoration. Other decorations: I used wooden blocks to make an Angry Bird scene on our bookcase. I hung the banners and birthday wreath. Over the tables I used balloons, curling ribbon, gold stars ( my son loves the new Angry Bird Space game) and a birthday banner that we use every year. For food we had the cake, sweet meatballs, salsa ranch dip and chips, wheat thins with chicken dip, a fruit tray and a veggie tray.

The End:
The party was a hit! The kids had so much fun knocking down the pigs, hunting eggs, smashing the King Pig piñata, and they even all wanted to make the craft birds/pigs. I think the adults had just as much fun. I have included some pictures. If you want to make any of these items and need more directions just let me know!
We got the pigs! :0)


Welcome!

Welcome to my blog. I never thought I would start one but then I had friends who said I should share my crafty ideas. So this will be a collection of my craft projects, holiday treats/decorations and my party planning. Please let me know what you think and if I can help you in any way feel free to let me know. My first post will be about my seven year old son's Angry Bird birthday party.