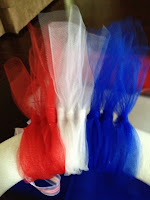
It is our year to host the annual 4th of July BBQ with our neighbors and I decided I needed some more decorations. All I have are some patriotic stars, a placemat and two Lenox mugs with flags in them. My first project was of course a wreath. Since my last 3 wreaths for the holidays were all made out of yarn I decided I wanted to try something different.
 Patriotic Tulle Wreath
Supplies:
2 Tulle spools of 25 yards in red, white and blue
Styrofoam wreath 14in.
Ribbon to hang the wreath
Glue Gun
Scissors
Cut the tulle into 22in. pieces. I used all of one spool and a little of the second one. The first step is to hot glue the ribbon to the wreath. I combined to different pieces of ribbon to get the look I wanted. Then fold the tulle in half and use the loop and pull through method around the wreath, starting right next to the ribbon. It worked best for me to use 3 of each color. Make sure you make them tight against each other. When you are finished you can add an accent piece to the wreath. I hot glued the star to the underside of the wreath. Then I fluffed the tulle and hung it on my door. I love the way it turned out!
Rockets!
My second project turned out to be hanging rockets. I made all four in one afternoon.
Supplies:
Cardboard paper towel cylinders
(I also used the cardboard from the tulle that I used up).
Scrapbook paper in patriotic patterns and colors.
Ribbon
Hot glue, scissors and something to help you cut a circle
Start off by cutting your circles for the tips of the rockets. Mine wet about 4 to 5 in. across. Once you have your circle, cut a slit in it from one side to the center. Then fold the circle around to form your rocket top and glue it together. Next, I cut the scrapbook paper and hit glued it to the cardboard.
To attach the rocket top poke two holes across from each other at the top of the rocket. This is for your ribbon to hang up the rocket. You could also use string. I cut a long piece of ribbon and pulled it through the two holes. Then I tied them in a knot close to the cardboard. Now, cut a small slit in the top of the rocket and pull both ends of the ribbon through. Once they are through knot them tightly at the top of the rocket. For the ribbon at the button of the rocket I cut 6 pieces of ribbon. I tried to use different colors and styles. Hot glue each piece of ribbon onto the cardboard. The final step is to cover where the ribbon with another coordinating piece of scrapbook paper. It can be as wide as you want it. Mine are about an inch. Hot glue the paper and then your rocket is finished. This turned out to be a very simple project and my 7 year old son was even able to help me. I love how festive they look. I think I will hang them in the patio.


